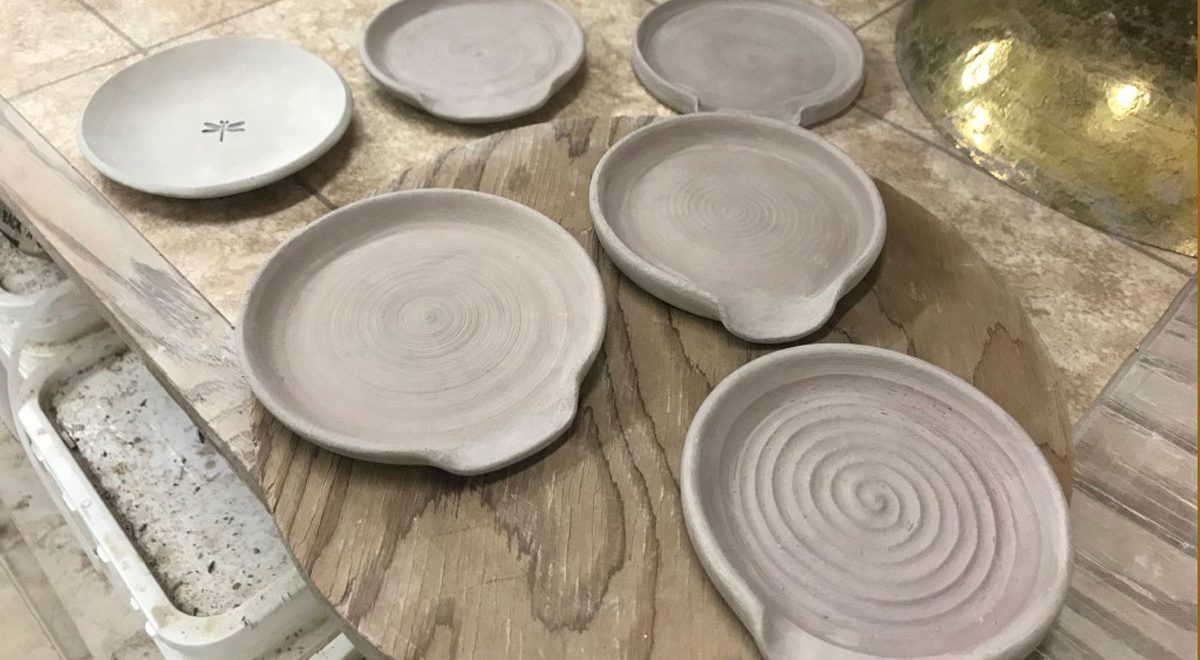
Let the spoon rest adventure continue! The spoon rests greenware were checked and moved to the bisque shelf in our community studio. They had reached the bone dry greenware state. ( See how I’m working on my pottery lexicon there.)
Everyone has a different definition of done, clean… you know… everything! The greenware state definition I’m using is:
Greenware - Clay (or a clay form) that has not been fired. ( I ordered what seems to be the quintessential pottery book, The Potter's Dictionary of Materials and Techniques, Fifth Edition by Frank Hamer and Janet Hamer from the library to see what they had to say on the topic because I've found greenware described as clay in any state of wet/dry or specifically/only dry clay going into a bisque kiln and will report back. )
Not sure why but I didn’t expect the definition of clay states to be up for debate. Science? I guess like everything else, there are different definitions and interpretations. Funny, just to cause trouble I looked up ‘bone dry’ clay too. Oh boy!
A ceramic piece that has been completed and dry but not yet fired . (Bone Dry).
Back to it… Sharing the spoon rest journey helps me track the process. Take a look…


Do you struggle with the drying learning curve? Me too!
I’m experimenting with how slow pieces need to dry (so no cracking) and the best way to achieve that… plastic batt, wood board, under plastic, all out there? Yikes! There are general factors to consider (some that don’t matter for the simple pottery this potter is playing with/practicing/making right now but good to learn ahead) including: the clay, the design, any added pieces, environment, etc. Here’s an article on drying I found helpful: Techno File: Drying 101, Ceramic News, Dave Finkelnburg, Dec 2015
Back to the drying… One step at a time, because I don’t want my pieces to crack yet see potters who can form, trim and then leave to dry… all out there.. Maybe they let a thrown item sit overnight (sometimes covered, sometimes uncovered), then trim the next day and leave uncovered to dry. Understanding that sometimes process/time has us using a wet box or keeping things under wraps (plastic wrap that is)… so to speak. 🙂 And that compressing the bottom is key to your crack avoidance/explosion avoidance strategy.
- But does slow really matter?
- How slow is slow enough?
- How much does time of year/temp/humidity play into this game?
And so the adventure continues…
The spoon rests were under plastic until Tuesday when I uncovered and stacked them on wooden batts. To share, they were thrown and the bottom well compressed but… noobie here. Surprise, surprise… by Wednesday the bottoms were no longer cold/cool… at all.
A cool/cold bottom is the test I learned for determining when a piece of greenware is dry enough to graduate to the bisque firing shelf. Until the piece is no longer cool or is room temp, there’s still too much drying happening and it’s not ready for the kiln. Let’s call it the cheek test… The temp of the bottom (or the thickest part) should be room temp or not cool when felt on your cheek.
Overnight seems like a short amount of time to finish drying but it’s summer and the studio is firing often (so it’s hot, hot, hot) so maybe not. Just to be sure, I left them there a couple more days. Then today (Friday) did a final once over and moved them to the bisque shelf – oh and added a handbuilt trinket dish to the stack that fit nicely on top.
Stay tuned for the rest of the spoon rest journey!
Editorial Note: I’m playing with different WordPress blocks over the next few posts so… everything will be it’s usual wonderfulness. ❤️